2.1. WordPress Simple Plugin
In this tutorial, we setup a simple WordPress Plugin and also explain an easy way to deploy it during development phase.
We use VSCode as IDE, but you are free to use your favorite PHP IDE.
To begin, create a new folder named wp-simple-plugin in wp-content/plugins. Change to wordpress directory and run,
sudo mkdir wp-content/plugins/wp-simple-plugin
sudo chown m.www-data wp-content/plugins/wp-simple-plugin -R
sudo chmod 755 wp-content/plugins/wp-simple-plugin -R
The wp-content/plugins folder is owned by www-data user, so we are using sudo (in linux) to create the new folder and then change its ownership to user id m (my user id). Use appropriate commands for your system, so that you get write permission to wp-simple-plugin folder. Next open the wp-content/plugins/wp-simple-plugin folder in the IDE and add the plugins’ main file wp-simple-plugin.php with following contents.
wp-simple-plugin/wp-simple-plugin.php
<?php

/**
 * Plugin Name: WordPress Simple Plugin
 * Plugin URI: http://www.example.org/wordpress-tutorial/
 * Description: Plugin to explain WordPress Plugin Basics
 * Version: 1.0.0
 * Author: maithilish
 * Author URI: http://www.example.org/about/
 * License: GPLv2
 */

defined( 'ABSPATH' ) or die( "Access denied !" );
The header comments are mandatory items and from this WordPress knows that it a plugin. WordPress also use these comments to display info about the plugin.
To disallow direct access to plugin pages, it is suggested to start all
php files of plugin with a defined( 'ABSPATH' ) or die().
Deploy the plugin
At this stage even though plugin doesn’t do anything useful, we can still deploy it to WordPress. To deploy, create a zip including the parent directory i.e. wp-simple-plugin directory.
$ cd workspace           // or location where you have created the project
$ zip -r wp-simple-plugin.zip wp-simple-plugin
Open WordPress Admin → Plugins → Add New and select and
upload the wp-simple-plugin.zip. Our bare-bone plugin is now visible
in Installed Plugins page and shows the info from header comments of
wp-simple-plugin.php. Activate the plugin.
In-place deployment
During development it is cumbersome to deploy the plugin like this. Better approach would be to use In-place deployment.
Remove the installed WordPress Simple Plugin. Go to WordPress Admin → Plugins → Installed Plugins and deactivate the WordPress Simple Plugin and then delete it.
In in-place deployment, we create a symbolic link to our project
directory in wp-content/plugins directory. This allows to continue the
plugin development in IDE workspace and changes are visible immediately
in WordPress. Let’s see how to do that.
# cd /opt/lampp/htdocs/wordpress-4.0.1/wp-content/plugins/
# ln -s $HOME/workspace/wp-simple-plugin wp-simple-plugin
change $HOME/workspace/wp-simple-plugin with the path where you have
created the plugin project.
Windows users have to create the shortcut wp-simple-plugin in folder
c:xampphtdocswordpress-4.0.1wp-contentplugins pointing to
workspacewp-simple-plugin.
With that link, our plugin deploys in-place to WordPress. However, plugin is inactive and we have to activate it in WordPress Admin → Plugins → Installed Plugins page.
Further code changes are visible in WordPress immediately with the browser refresh.
Plugin deletion.
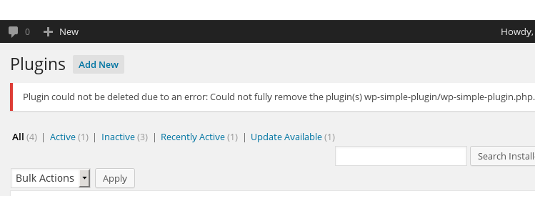
In-place deployment is very convenient during development, but there is
a downside. If we delete the plugin, then WordPress deletes
wp-simple-plugin directory as well as its files, which simply means it
deletes our project in workspace. Remember to take a backup of the
project directory before doing a delete else you will loose all the hard
work.
In Linux, alternatively, use permissions to avoid this nasty surprise. Create symbolic link as root and change its ownership with following command.
# cd /opt/lampp/htdocs/wordpress-4.0.1/wp-content/plugins
# chown -h daemon.daemon wp-simple-plugin
In IDE workspace, create the actual plugin project as regular user (non root user). WordPress will not be able to delete the files owned by other users as httpd process owner is daemon.
An added benefit with this method is that we need root access only to create initial symbolic link. During development, we can add new files to the project as regular user.
In the next section, let’s add some functionality to our plugin.