Plugin Unit Test
One of the challenges that we faced while developing the Share on Social Plugin was to setup unit tests. Many tutorials and blogs on the subject and even the official WordPress documentation couldn’t help us much to overcome the initial hurdles. Knowing well the difficulties faced by the beginners, some developers have packaged and hosted the testing frameworks for WordPress on GitHub to ease the setup but they are unable to reduce the overall confusion.
For us, it took some time to figure out how WordPress itself tests its core. Once we understood the WordPress testing setup and methodology, plugin tests became quite smooth. This tutorial series - WordPress Plugin Unit Testing - is based on our experience in testing a production ready plugin, and it explains testing in a step by step fashion so that beginners can easily setup unit test for their projects. The blogs in this cookbook covers important aspects of plugin unit test; setup and configure WordPress Testing Library, plugin basic and advanced tests such as tests for action and filter, i18n, Ajax and Multisite.
We will try to make the tutorial as easy as possible considering the size of test suit. While there are about 2000 plus lines of code in our plugin, the code to test them crosses 5000 lines. It would be quite boring to explain all the tests, file by file, as some test patterns repeats throughout the test suit. Instead, we group the test cases into categories and take a couple of typical test cases from each category and explain their pattern so that you can easily adapt them for your project.
However, we will not dwell too much on unit test per se - it’s importance and the best practices - as there are enough blogs on the subject and so, we avoid repeating those things all over again.
12.1. WordPress PHPUnit Setup
In this tutorial, we install the modules and then do the configurations required to run Plugin unit tests. Most confusing part of WordPress testing is its configuration and keeping this in mind, tutorial provides step by step instructions with an example of Simple WordPress Plugin. Once you understand the configuration and able to run tests against Simple Plugin, it is easy to map it for any plugin you plan to develop.
Install PHPUnit
WordPress uses PHPUnit unit test framework for PHP. The latest release of PHPUnit is bundled as a PHAR file (PHP Archive) which is quite easy to install and use.
For Linux, install PHPUnit with following commands.
$ wget https://phar.phpunit.de/phpunit.phar
$ chmod +x phpunit.phar
$ mv phpunit.phar /usr/local/bin/phpunit
Verify the installation, with following command.
$ phpunit --version
PHPUnit x.y.z by Sebastian Bergmann and contributors.
For Windows, refer PHPUnit Installation for Windows. PHPUnit requires PHP 5.3.3 or above, and Windows users also have to install PHP, if not installed.
Create Simple Plugin
To understand the unit test setup, we require a simple plugin. If you have already created the simple plugin explained in WordPress Simple Plugin then you can reuse it, otherwise create a new one as explained here.
Create a directory named wp-simple-plugin in some location and add
plugin main file wp-simple-plugin.php to it with following contents.
wp-simple-plugin/wp-simple-plugin.php
<?php

/**
 * Plugin Name: WordPress Simple Plugin
 * Plugin URI: http://www.codetab.org/tutorial/wordpress/
 * Description: Plugin to explain WordPress Plugin Basics
 * Version: 1.0.0
 * Author: maithilish
 * Author URI: http://www.codetab.org/about/
 * License: GPLv2
 */

defined( 'ABSPATH' ) or die( "Access denied !" );

define('WPSP_NAME','wp-simple-plugin');

define( "WPSP_URL", trailingslashit( plugin_dir_url( __FILE__ ) ) );
As we not going to install or use the simple plugin in WordPress, there is nothing functional in it apart from the usual plugin header and a couple of define statements.
Next, we require a directory to hold configuration files and the test
cases. Create following directories under wp-simple-plugin folder with
following commands.
$ cd wp-simple-plugin
$ mkdir tests
$ mkdir tests/phpunit
$ mkdir tests/phpunit/tests

// or create all directories recursively

$ mkdir -p tests/phpunit/tests
Install WordPress Tests Library
To run unit test against WordPress, we require WordPress Tests
Library. Install the library under tests/phpunit directory with
following commands.
$ cd wp-simple-plugin
$ cd tests/phpunit
$ svn co https://develop.svn.wordpress.org/trunk/tests/phpunit/includes/
SVN pulls the latest version of WordPress Test Library from WordPress
repository and saves it under tests/phpunit/includes .
When we run tests, WordPress Test Library ( i.e. files of includes directory ) integrates PHPUnit with WordPress to handle following tasks.
creates a new instance of WordPress.
creates WP tables in test database.
runs test cases against test instance of WP including special test cases such as Ajax calls and Multisite tests cases.
when tests are through, deletes the tables to clean up the test database.
Setup Configuration Files
The first configuration file is phpunit.xml, which as name suggests is
a PHPUnit file and it defines the test suit and test files. Add
phpunit.xml with following contents to the top directory of the plugin.
wp-simple-plugin/phpunit.xml
<phpunit bootstrap="tests/phpunit/bootstrap.php" backupGlobals="false"
        colors="false" convertErrorsToExceptions="true"
        convertNoticesToExceptions="true" convertWarningsToExceptions="true">
        <testsuites>
                <testsuite>
                        <file>tests/phpunit/tests/test-wp-simple-plugin.php</file>
                </testsuite>
        </testsuites>
</phpunit>
PHPUnit configuration defines single testsuite with one test file. Later we add more test files to the testsuit element.
In phpunit element we indicate that PHPUnit has to use
tests/phpunit/bootstrap.php to bootstrap the tests. Add the
bootstrap.php to wp-simple-plugin/tests/phpunit directory.
wp-simple-plugin/tests/phpunit/bootstrap.php
<?php

// path to test lib bootstrap.php
$test_lib_bootstrap_file = dirname( __FILE__ ) . '/includes/bootstrap.php';

if ( ! file_exists( $test_lib_bootstrap_file ) ) {
    echo PHP_EOL . "Error : unable to find " . $test_lib_bootstrap_file . PHP_EOL;
    exit( '' . PHP_EOL );
}

// set plugin and options for activation
$GLOBALS[ 'wp_tests_options' ] = array(
        'active_plugins' => array(
                'wp-simple-plugin/wp-simple-plugin.php'
        ),
        'wpsp_test' => true
);

// call test-lib's bootstrap.php
require_once $test_lib_bootstrap_file;

$current_user = new WP_User( 1 );
$current_user->set_role( 'administrator' );

echo PHP_EOL;
echo 'Using Wordpress core : ' . ABSPATH . PHP_EOL;
echo PHP_EOL;
In bootstrap.php, we first check whether WordPress Tests Libs' bootstrap.php exists in includes directory else exit from the test run. Next, we create an array which holds details of Simple Plugin as active plugins and add the array to $GLOBALS[‘wp_tests_options’]. WordPress Tests Lib activates and loads the plugin using these details. We will explain the significance of the second item of the array, wpsp_test, in the next blog.
After defining the plugin details, we call includes/bootstrap.php
using require_once statement. The includes/bootstrap.php which is
actually the bootstrap file that comes with WordPress Tests Lib loads
new WordPress instance, activates and loads the Simple Plugin.
Next, we create the default user for test by using WordPress class WP_User and set administrator role to it.
Earlier, we explained that includes/bootstrap.php creates a new instance
of WordPress, but from where it gets the configurations for WordPress.
The third and last configuration file is the wp-tests-config.php which
provides the configurations to WordPress test instance. Add the
wp-tests-config.php to tests/phpunit directory with following
contents.
wp-simple-plugin/tests/phpunit/wp-tests-config.php
<?php

// change the next line to points to your wordpress dir
define( 'ABSPATH', '/opt/lampp/wptest/wordpress/' );

define( 'WP_DEBUG', false );

// WARNING WARNING WARNING!
// tests DROPS ALL TABLES in the database. DO NOT use a production database

define( 'DB_NAME', 'wptest' );
define( 'DB_USER', 'wptest' );
define( 'DB_PASSWORD', 'wptest' );
define( 'DB_HOST', 'localhost.localdomain' );
define( 'DB_CHARSET', 'utf8' );
define( 'DB_COLLATE', '' );

$table_prefix = 'wptests_'; // Only numbers, letters, and underscores please!

define( 'WP_TESTS_DOMAIN', 'localhost' );
define( 'WP_TESTS_EMAIL', 'admin@example.org' );
define( 'WP_TESTS_TITLE', 'Test Blog' );

define( 'WP_PHP_BINARY', 'php' );

define( 'WPLANG', '' );
It defines the location of WordPress software using which instance has to be created and the name of the test database.
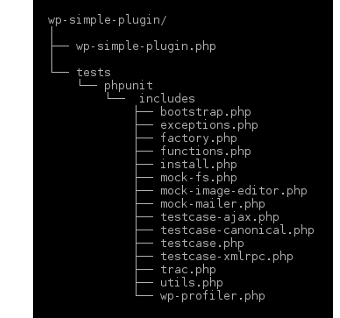
At this point, your wp-simple-plugin directory structure should be
similar to the one shown in the screenshot.

Create Test Database
In wp-tests-config.php we defined MySQL connection properties pointing
to a test database. We need to create the database and user, and grant
permissions so that WordPress can create tables and run tests. Use
following commands to accomplish that.
$ cd /opt/lampp
$ bin/mysql -u root
mysql> create database wptest;
mysql> GRANT ALL PRIVILEGES ON wptest.* TO wptest@localhost IDENTIFIED BY 'wptest';
mysql> flush privileges;
mysql> exit
Install WordPress
WordPress Tests Library requires WordPress software to create an test
instance. In wp-tests-config.php, we defined ABSPATH pointing it the
location of WordPress at /opt/lampp/wptest/wordpress/, but you are
free to install WordPress in any other location. While defining ABSPATH
ensure that path ends with a trailing slash as in
/opt/lampp/wptest/wordpress/ otherwise WordPress fails to load.
Download the latest archive of WordPress and extract it with following commands.
$ cd /opt/lampp/
$ mkdir wptest
$ cd wptest
$ unzip wordpress-4.1.zip
$ chown -R xyz.xyz wordpress   // xyz is the user who runs test
$ chmod -R 775 wordpress
User who runs test should have write access to wordpress/wp-content directory and last two commands chown and chmod are used to set the permission to wordpress and its subdirectories.
No further installation is required as WordPress as Tests Library will
use wp-tests-config.php to configure the WordPress Instance it
creates.
Production WordPress
We can point ABSPATH to any existing WordPress folder and run tests but
there is a downside. For some reason, if wp-tests-config.php is
missing from tests/phpunit directory, then WordPress Test Library will
use wp-config.php of the WordPress folder and drops the WP tables
defined by it. Keep this in mind, while pointing ABSPATH to a WordPress
folder of production site as you may end up loosing the production
database.
Since space required of WordPress software is very small it is much safe
to place WordPress in a dedicated test folder such as
/opt/lampp/wptest and keep it exclusively for testing. It also allows
us to place multiple WordPress version in wptest folder and run tests
against multiple versions.
Create Link to Plugin
We had defined Simple Plugin as active plugin in
tests/phpunit/bootstrap.php, but Test Library loads only the plugins
present in wordpress/wp-content/plugins directory. If we develop the
plugin directly from the plugins directory then Test Library finds and
activates the plugin without any problem.
Normally, it is much more convenient to develop the plugin from IDE
workspace or some other location and in such case, we have to create a
symbolic link to plugins’ actual location in
wordpress/wp-content/plugins/ directory.
For example, if Simple Plugin is at /home/xyz/work/wp-simple-plugin
and WordPress package is at /opt/lampp/wptest/wordpress, then create
symbolic with following commands.
$ cd /opt/lampp/wptest/wordpress/wp-content/plugins
$ ln -s /home/xyz/work/wp-simple-plugin wp-simple-plugin
That completes the WordPress PHPUnit Setup. In the next blog, we write a couple of simple unit tests and check whether the setup is working as expected.