In the previous chapter, we created a WordPress application on OpenShift platform. In this chapter, we go through WordPress installation and Admin Dashboard.
WordPress Installation
WordPress Installation is a simple affair. Open the app’s Public URL in the browser. If you forget to note the URL, then you need to revisit the Application Overview Screen in OpenShift Web Console and find out the Public URL. On the first access, WordPress displays the Welcome screen where we have to fill site’s title and also, information about an administrator user.

Fill Site Title, Username, Password and your e-mail ID. The User ID gets administrator privileges and access to the Admin Dashboard. WordPress uses the e-mail to send password reset mail, etc.
Privacy
It is important to uncheck the last field Privacy - Allow search engine to index this site, else as soon as we create any post in WordPress, search engines bots (crawlers) may visit our unfinished site and start indexing them.
After our site is ready, we may allow search engines to index the site. We show how to do that in the next section.
After filling the details, click Install WordPress. Installation finishes in a couple of seconds and displays the success page. During the installation, WordPress creates required tables in a MySQL database, to store the data like User profile, Contents, Settings, etc.
Now we can log in to WordPress. Click Log In and enter User ID and Password. On the log in, WordPress displays the Admin Dashboard.
Admin Dashboard URL
To access Admin Dashboard use :
http://quickstart-wordpressguide.rhcloud.com/wp-admin/To access WordPress site use :
http://quickstart-wordpressguide.rhcloud.com/
Admin dashboard contains menu options to manage Posts, Pages, Media items, Comments, Plugins, Themes, Users and Settings. It also shows site stats like number of Posts, latest comments and recent activity, etc.
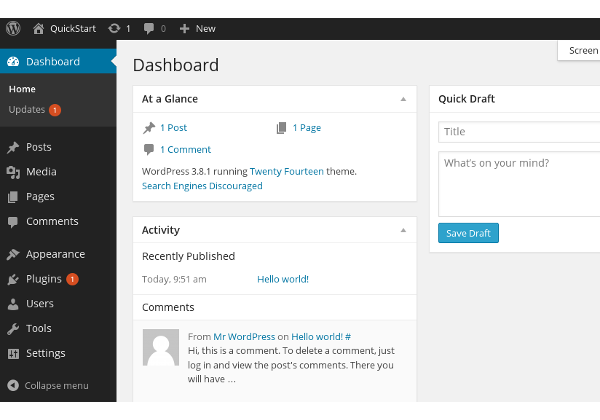
WordPress Dashboard
Throughout the WordPress Tutorial, we go through the Dashboard menu one by one. Before closing this chapter, we quickly cover couple of basic options.
Dashboard Screen options
On the top right side of the dashboard, there is a tab - Screen option which on click expands to display Show on screen options.
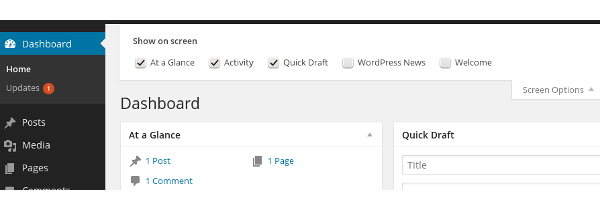
Here, you may set the items that are to be displayed on your dashboard. Screen options varies from screen to screen. For example, for Media Library screen, it lets us set the number of media items in a screen and columns to display.
Switch between Dashboard and Site
To visit the site from the dashboard, we need to use Home icon (next to WordPress icon) in the left end of Admin bar, which shows Visit Site.
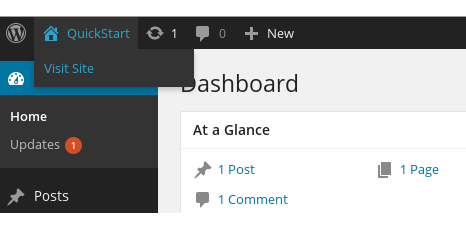
Click on Visit Site to visit the site.
When we switch to the site from the dashboard, WordPress continue to display Admin bar at the top. To switch back, click on Home icon and select Dashboard from the drop down list. To avoid back and forth, open the site in another tab.
Before adding contents to our site, we need to complete the basic settings. In the next chapter, we go through some of the important settings.