Command line Apache Ivy was quite helpful to learn Ivy concepts and basic tasks, but it is a bit difficult to work with that in an IDE. IvyDE Plugin for Eclipse, which bundles Apache Ivy and Ivy Ant tasks, enables Eclipse projects to exploit the full benefits of Apache Ivy for project dependency management.
Before proceeding further, install IvyDE Plugin for Eclipse as explained in Apache Ivy and IvyDE Installation.
IvyDE Resolve
Let’s use IvyDE Plugin to resolve dependencies of an Eclipse Java
Project. Create a regular Java Project in Eclipse named simpleivy.
Create a package named in.ex.ivy and add SimpleIvy class.
in.ex.ivy.SimpleIvy.java
package in.ex.ivy;

import org.apache.commons.lang.StringUtils;

public class SimpleIvy {
    public static void main(String[]] args) {
           String string = StringUtils.upperCase("Ivy with Eclipse");
           System.out.println(string);
    }
}
As expected, Eclipse shows errors since it is unable to find commons.lang in the project’s build path. Let’s delegate the build path management to Ivy . For this, add dependency file ivy.xml to the top folder (i.e. root folder) of the project.
ivy.xml
<?xml version="1.0" encoding="ISO-8859-1"?>
<ivy-module version="2.0" xmlns:xsi="http://www.w3.org/2001/XMLSchema-instance"
     xsi:noNamespaceSchemaLocation="http://ant.apache.org/ivy/schemas/ivy.xsd">
 <info organisation="in.ex" module="simpleivy" status="integration">
 </info>
 <dependencies>
  <dependency org="commons-lang" name="commons-lang" rev="2.6" />
 </dependencies>
</ivy-module>
This is the same old ivy.xml we used earlier in Apache Ivy Resolve. Dependencies element indicates that our project is dependent on commons-lang revision 2.6. You may also use File → New → Other → IvyDE Ivy File Wizard to add the ivy.xml file.
Now the project structure looks as
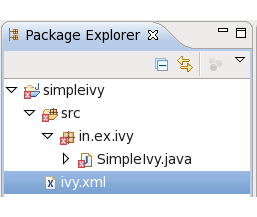
Figure 8.1. Eclipse Project Layout
IvyDE Setup
To setup IyvDE, we need to add an Ivy Library . To do that, right click
on ivy.xml and from the context menu, choose Add Ivy Library…,
which takes us to IvyDE Managed Libraries window
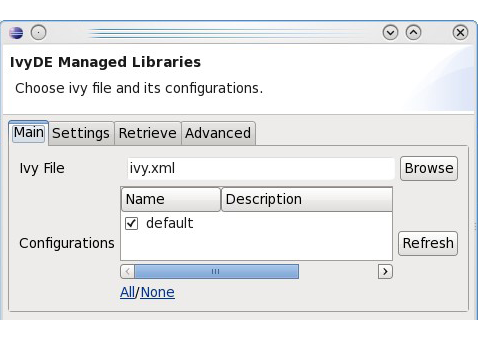
Figure 8.2. IvyDE Managed Libraries Settings
In the Main tab, ivy.xml is set as Ivy File. Leave the Configurations to default. For the moment, don’t bother about other tabs - Settings, Retrieve and Advanced - which we use in the next chapter. Click Finish. This will add a library managed by IvyDE to the project build path. As soon as you hit the Finish, IvyDE triggers a resolve and gets into the job of resolving the dependencies mentioned in the ivy.xml. It checks whether Rev 2.6 is in the cache else fetch it from public. Progress Bar at the bottom shows the IvyDE resolve job’s progress.
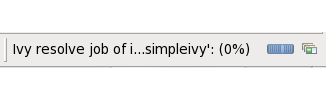
Figure 8.3. IvyDE Resolve Progress
Project errors are cleared, once resolve is over as commons-lang is added to build path of project by IvyDE. We are free to add additional dependency lines in ivy.xml and Ivy will fetch and add them to the project build path as soon as ivy.xml is saved.
But these libraries are special in a sense that they are managed by IvyDE. Internally IvyDE uses Ivy to resolve the dependencies mentioned in ivy.xml and add them to project’s build path.
To know what’s going on under the hood, let’s explore the project build path. Select project in the Project Explorer and right click to get the context menu and then choose Build Path → Configure Build Path which shows the Java Build Path window. Select the Libraries tab which shows two libraries ivy.xml and JRE System Library. Expand ivy.xml entry and then commons-lang-2.6.jar to get the library details
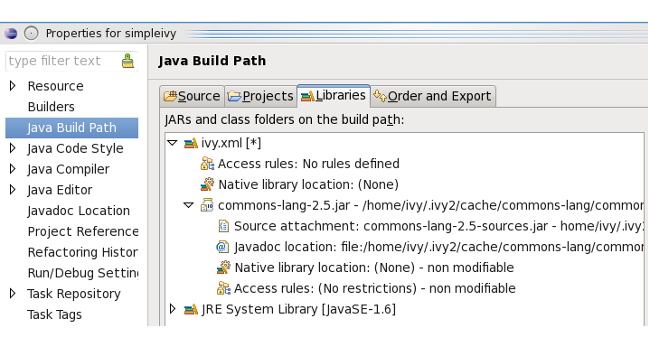
Figure 8.4. IvyDE and Eclipse Java Build Path
As we can see IvyDE has linked source and javadoc automatically. All dependencies mentioned in ivy.xml will be grouped under a single ivy.xml [*] entry.
IvyDE is extremely simple to use. With just a couple of steps - add ivy.xml to the project and use Add Ivy Library menu option - Apache Ivy is on a roll.