11.2. Enable WordPress Multisite
To understand plugin multisite activation, we require a WordPress Multisite installation. In this blog, we install a new instance and enable WordPress Multisite.
Install WordPress
So far in the tutorial, we used WordPress Single Site installation and it is possible to convert it to Multisite installation. Still, better approach is to install a new instance of WordPress and use it for multisite testing so as to leave the existing installation free for single site testing.
Install a new instance of WordPress as explained in WordPress Installation. Steps to install the new instance are summarized below.
unzip
wordpress.zipto/opt/lampp/htdocsand rename the wordpress directory aswordpress-mswhere ms stands for multisite. Any other name would also do.edit
/opt/lampp/htdocs/index.phpand change all references to directory wordpress-4.0.1 to wordpress-ms. If index.php doesn’t exist, create it as explained in Chapter 1.edit
/opt/lampp/htdocs/.htaccessand change all references to directory wordpress-4.0.1 to wordpress-ms. If .htaccess doesn’t exist, create it as explained in Chapter 1.add
wp-config.phpfile to new wordpress directory i.e./opt/lampp/htdocs/wordpress-ms/and in wp-config.php file define the database name as wordpress_ms instead of wordpress. Use _ (underscore) in database name and not - (dash)./** The name of the database for WordPress */ define('DB_NAME', 'wordpress_ms');All other configurations are same as the earlier one. If you have already installed WordPress as explained in Chapter 1, then you can copy the wp-config.php from the existing WordPress directory to wordpress-ms directory and then change database name as wordpress_ms.
login to MySQL and create new database wordpress_ms and grant privileges.
$ cd /opt/lampp
$ bin/mysql -u root
mysql> create database wordpress_ms;
mysql> GRANT ALL PRIVILEGES ON wordpress_ms.* TO wp@localhost IDENTIFIED BY 'wp';
mysql> flush privileges;
mysql> exit
To install multiple instances the installation process require some minor changes. Before proceeding with the usual WordPress installation, go through the next section which explain how to add default site when you use multiple instances of WordPress.
Add Default Site
With everything in place, open browser and access http://localhost to
bring up the WordPress Installation screen.
In the Installation Screen, give site name as WP 1. It becomes the first site (default site) under the WordPress Multisite, so we name it as WP
- But, you are free to choose any other name. Complete the installation process after entering other fields.
Now, we can use URL http://localhost/wordpress-ms/wp-admin/ to login to
admin module. However, when we use URL http://localhost/wp-admin/ login
will not happen even though redirects are provided in the .htaccess. We
need to correct this inconsistency before moving forward otherwise
multisite installation misbehaves.
To rectify the inconsistency, login to WordPress Admin Dashboard by
using URL http://localhost/wordpress-ms/wp-admin/ and in the admin menu,
go to Settings → General to open the General Settings Page.
At this point, WordPress Address (URL) and Site Address (URL) fields
points to http://localhost/wordpress-ms.
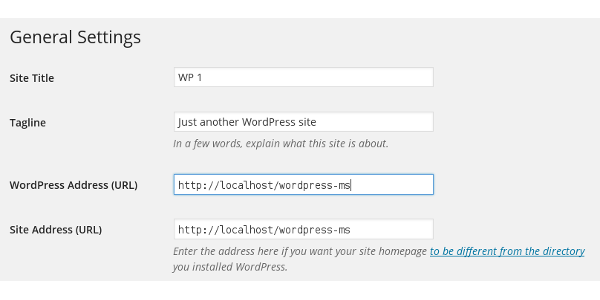
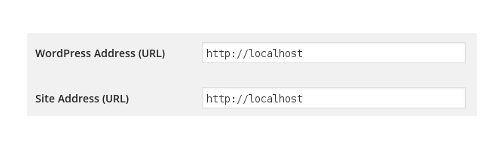
Modify both these fields and change URL to http://localhost and save
changes. After the save, logout from WordPress.
Next, login using URL http://localhost/wp-admin/ and you should be able
to login to Admin Dashboard without any trouble.
Warning
Setting these two URL properly is very important for proper working of
WordPress multisite. Hence do it correctly and verify that you are able
to login to Admin Dashboard with URL http://localhost/wp-admin/ and to
WordPress site WP 1 using URL http://localhost.
Enable Multisite
To configure and setup multisite, first we need to allow multisite. To
do that, logout from admin screen, if logged in and edit
wordpress-ms/wp-config.php and add following line just before the line
that reads /* That’s all, stop editing! Happy blogging. */
   ....

define('WP_ALLOW_MULTISITE',true);

/* That's all, stop editing! Happy blogging. */
   ....
This config will add a new sub menu Network Setup to Tools menu.
Setup Network
Next step is to setup a network of WordPress sites.
To do that, do a fresh login as admin and in admin menu select Tools → Network Setup to open the Create a Network of WordPress Sites page.
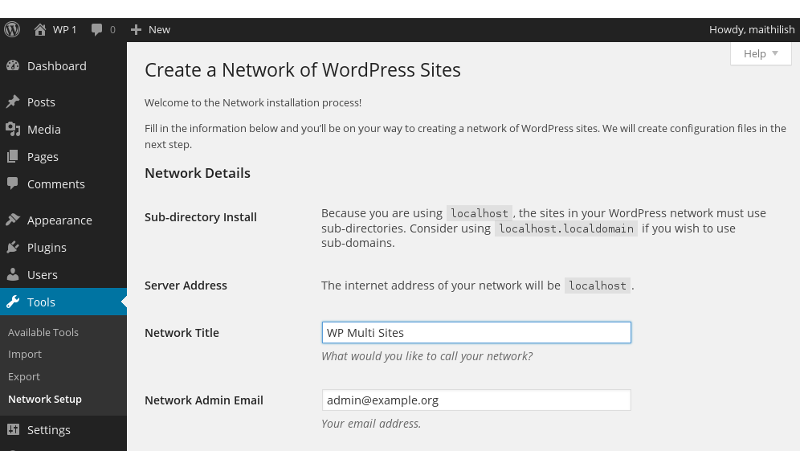
In Network Title field, enter the network title as WP Multi Sites and click Create Network to create the network.
Network Types
WordPress supports two types of network installation - Sub-directory Install and Sub-domain Install. In the first type, WordPress sites will have addresses such as xyz.com/wp1, xyz.com/wp2 etc., while under the second type, sites will have addresses such as wp1.xyz.com, wp2.xyz.com.
When we use localhost as the server, WordPress supports only the sub-directory install. To use sub-domain install in local server, we need to setup the server host name as localhost.localdomain.
For plugin development, Sub-Directory install is sufficient and so, we stick with the default.
After creating the network, WordPress generates the configurations that has to be added to wp-config.php and .htaccess file.
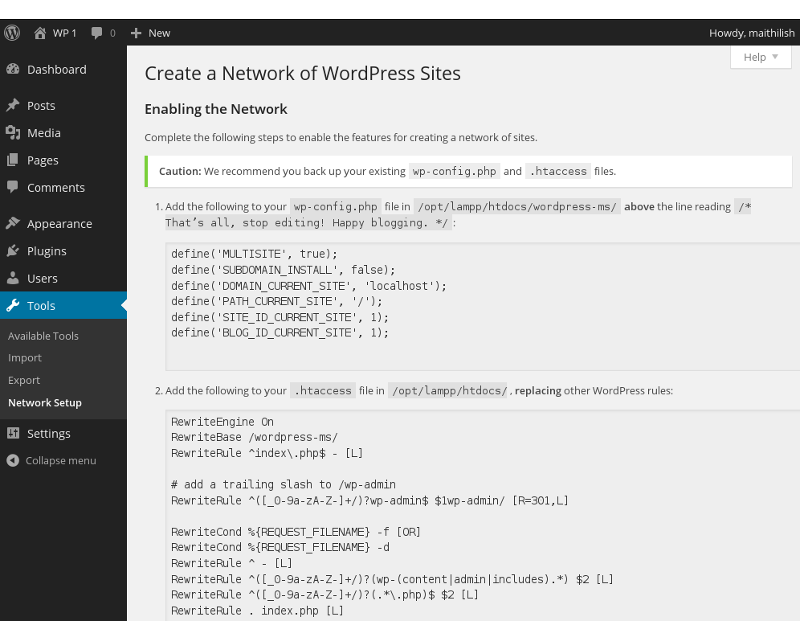
Copy the first part of the configuration and paste it to
wordpress-ms/wp-config.php, as usually just above the Happy blogging
line.
/opt/lampp/htdocs/wordpress-ms/wp-config.php
  ....
define('WP_ALLOW_MULTISITE',true);

define('MULTISITE', true);
define('SUBDOMAIN_INSTALL', false);
define('DOMAIN_CURRENT_SITE', 'localhost');
define('PATH_CURRENT_SITE', '/');
define('SITE_ID_CURRENT_SITE', 1);
define('BLOG_ID_CURRENT_SITE', 1);

/* That's all, stop editing! Happy blogging. */
  ....
Copy the second part of the configuration and paste it the
htdocs/.htaccess. The file, after changes, should look as follows.
/opt/lampp/htdocs/.htaccess
# BEGIN WordPress
<IfModule mod_rewrite.c>

RewriteEngine On
RewriteBase /
RewriteRule ^index.php$ - [L]

# add a trailing slash to /wp-admin
RewriteRule ^([_0-9a-zA-Z-]+/)?wp-admin$ $1wp-admin/ [R=301,L]

RewriteCond %{REQUEST_FILENAME} -f [OR]
RewriteCond %{REQUEST_FILENAME} -d
RewriteRule ^ - [L]
RewriteRule ^([_0-9a-zA-Z-]+/)?(wp-(content|admin|includes).*) wordpress-ms/$2 [L]
RewriteRule ^([_0-9a-zA-Z-]+/)?(.*.php)$ wordpress-ms/$2 [L]
RewriteRule . index.php [L]

</IfModule>

# END WordPress
Once changes are completed, logout from WordPress and login again. Now, admin screen will have a new menu item My Sites in the top bar.
Multisite Admin Menu
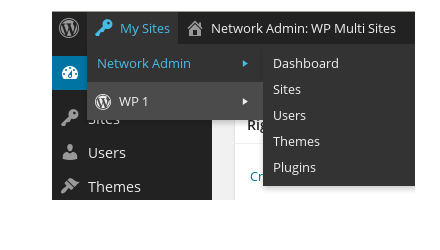
The multisite admin menu My Sites is a drop down menu which at this point contains two sub menu items - Network Admin and WP 1.
Network Admin menu is used manage network wide functions such as add and manage sites, users, themes and plugins. To shift to Multisite Network Dashboard and its menu panel, use My Sites → Network Admin → Dashboard.
The home icon next to My Sites indicates the active dashboard which in the screenshot is Network Admin.
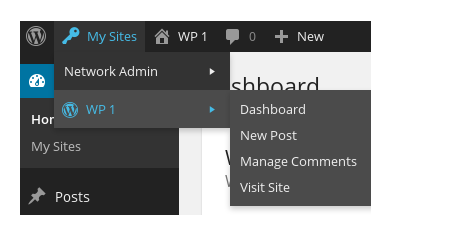
Below the Network Admin menu, WordPress lists menu for the sites in the network. At this point, our multisite network has only one site, WP 1. To open its admin dashboard and the admin menu panel use My Sites → WP 1 → Dashboard.
The Home icon next My Sites indicates that active dashboard is WP 1.
Add Sites
To test plugin multisite activation, we require at least two sites. Let’s add one more site to the network.
Open Network Admin Dashboard with My Sites → Network Admin → Dashboard. Then select Sites → Add New from the left side menu panel to open the Add New Site page.
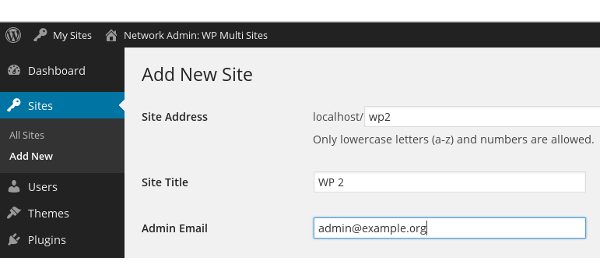
In the Site Address field enter wp2 (only lowercase letters and
numbers are allowed) and in Site Title enter the name of the site as
WP 2. Add the site, after entering other fields. The address of the new
site will be http://localhost/wp2/.
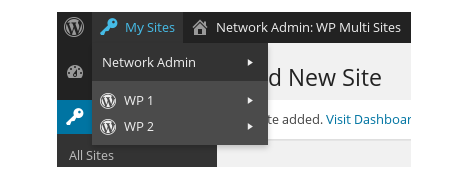
Now WP 2 sub menu is listed under My Sites and we can use My Sites → WP 2 → Dashboard to open the WP 2 Admin dashboard.
In the next section, we learn about plugin activation in WordPress Multisite Installations.