In the OpenShift WordPress Tutorial, we cover the steps to create a free OpenShift account and a WordPress application.
OpenShift is a cloud computing Platform as a Service (PaaS) from Red Hat, which, in simple terms, means it offers a virtual server with all the server components we need to run an application. In other words, OpenShift offers a virtual development environment - Linux OS with Internet connectivity - where we are free to deploy, develop and run various types of application written in supported languages. OpenShift engineers and system administrators take care of OS upgradation, security patch management, network management and other Sys admin tasks and frees us to focus on application development.
To understand OpenShift better, let us go ahead and create an OpenShift WordPress application.
OpenShift WordPress Tutorial
Create OpenShift account
To start using OpenShift, we need to create an account:
Open OpenShift and choose Sign up for Free. In the Sign Up page, enter your e-mail. After filling other details, sign up to OpenShift. It sends a verification mail to your e-mail account. Check the mailbox for the mail from OpenShift and use it to complete the verification process.
After completing the verification, go back to OpenShift and login using Sign In link on the top right.
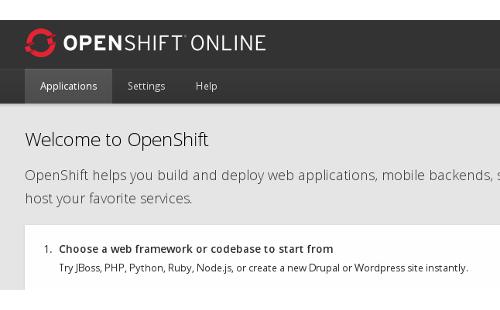
Accept the Legal Terms to complete the account creation. OpenShift displays the Management Console with the welcome message. In the rest of the tutorial, we refer to this console as OpenShift Web Console.
![OpenShift WordPress Tutorial - OpenShift Management Console]()
Create Namespace
URL of any application hosted in OpenShift ends with rhcloud.com. Then how to distinguish our applications from others? For that, OpenShift uses a concept called namespace, which is also known as domain.
Before doing anything else, we need to configure namespace for the account. To configure namespace, click on Settings tab and web console displays the Namespace screen.
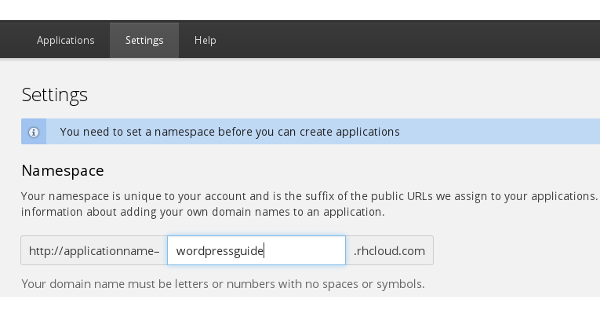
In the above screenshot, we have chosen wordpressguide as the namespace. Namespace is unique to the account and in case, if you try to use wordpressguide as the namespace (domain name), then OpenShift says Namespace - wordpressguide is not available as the name is already allotted to our OpenShift account. So, you have to choose some other name, which is not already taken by others. After filling namespace, click Save. OpenShift creates the namespace and attaches it to the account.
OpenShift uses domain name as a suffix to the base URL - rhcloud.com and URL for our account becomes wordpressguide.rhcloud.com.
Create Application
Next, we are going to create an application. In the OpenShift web console, select Applications Tab. In the Applications screen, click Create your first application now. In the next screen - Choose a type of application - scroll down to Instant App section and select WordPress 3.x
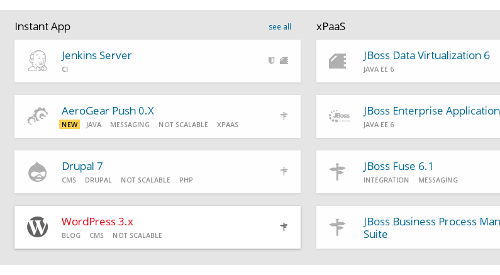
It takes us to the next screen - Configure the application.
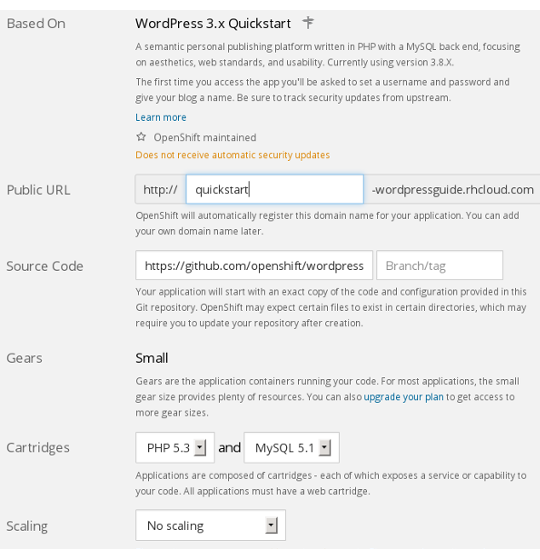
In screen, enter the application name in Public URL field. We have chosen quickstart as the application name, but it may be anything. While you cannot use wordpressguide as your domain name, there is no such restriction for the application name, and you are free to use quickstart as name of your application. Leave all other fields as it is and click Create Application. OpenShift gets into application creation, which may take up to a couple of minutes.
Note
Throughout the tutorial, we use wordpressguide as the example domain name and quickstart as the application name. When you try out examples in OpenShift, remember to replace them with your domain and application name.
Once application is created, web console displays Next Steps screen.
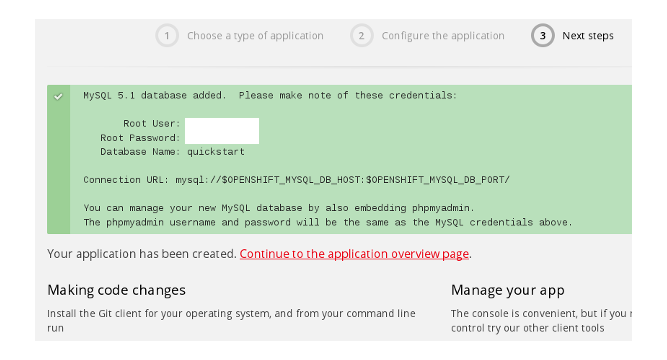
This screen shows info about MySQL database and also the various things that we can do with the application. There is no need to note down the database user and password as they are always available from the web console. Similarly, we may ignore other details in this screen for the time being.
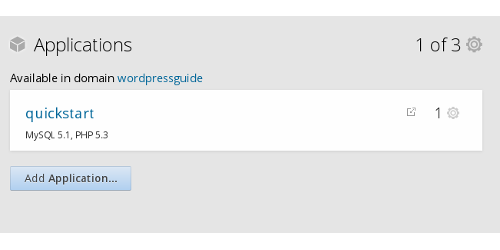
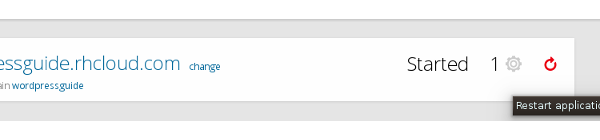
Go back to Applications tab, which now shows the newly created application. OpenShift free plan allows us to create three applications and 1 of 3 at the top right indicates that we have created one application out of the allowed three. Our domain wordpressguide has one application, quickstart, which uses two server components - MySQL 5.1 and PHP 5.3.
Click the application quickstart to view the Application Overview page.
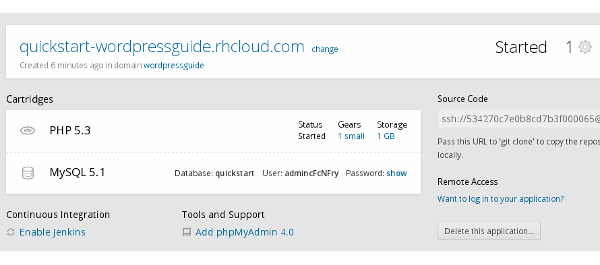
Application Overview screen shows the details about the cartridges (server components) used by the application and on what Gear cartridges are running and how much storage is allotted to them. We explain Cartridges and Gears in a moment.
Another important piece of information in the Overview page is the application’s Public URL. For the example application, it is quickstart-wordpressguide.rhcloud.com.
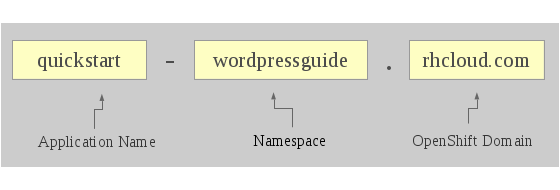
App URL
URL starts with the application name, then a - (dash), followed by the Namespace then a . (dot) and ends with rhcloud.com.
At any time if you wish to delete an application and start fresh, use Delete this application... button of this page. There is no limit on the number of times we recreate applications, which is a good thing when we try out OpenShift.
Now WordPress Instant App is ready for access. Click the Public URL or open the Public URL in a new browser tab and we land in the WordPress Welcome page.
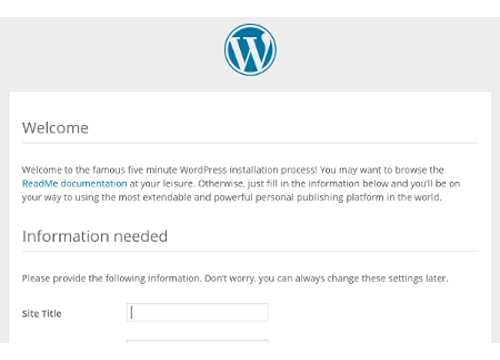
Page not found - 404 error
Sometimes, when we first access the app, we may get 404 Page Not found error. That happens when the app’s Public URL is not yet propagated to DNS (Domain Name Servers) which may take up to a minute or two, or it may also happen when browser cache is not refreshed. When we get 404 error, close the browser wait for some time and then access the app again.
In case problem persists, then we may have to restart the application. Go to Application Overview page of the app and click App Restart, which is at top right corner.
After the restart, wait for a while and then access the app from a newly opened browser, and this should resolve the 404 issue.
We go through the WordPress - famous five minute - installation and settings in the next chapter.
Let’s pause for a moment and recap what we have done so far. First, we setup domain name for the OpenShift account and then add an instant application. When we hit Create Application button, OpenShift took fairly long time to complete the operation and it is because, behind the scene, OpenShift has setup many things for us:
Carved out a virtual Linux server for us.
Setup the networking configuration.
Propagate server’s IP address and domain name to Domain Name Servers (DNS)
Install and configure Apache Web Server with PHP module.
Install and configure a MySQL database.
Install WordPress in Apache Web Server.
Setup GIT repository to enable development environment.
Setup permission and secure the whole setup.
It requires a great deal of efforts and tons of knowledge to accomplish this on our own. That is the magic of OpenShift, which spun off a secured, fully functional, public facing, application development hosting environment in a matter of minutes. Having worked in a couple of cloud platforms, we would like say, without any hesitation, that OpenShift is one of the best out there and by far the easiest.
Before concluding the OpenShift WordPress Tutorial, let us understand some of the core OpenShift concepts.
OpenShift Gears and Cartridges
Gear is a resource-constrained container or virtual host that runs one or more user-specified software stacks (cartridges) and application code. Free plan comes with 3 small gears. Small gear comes with 512MB of RAM and 1GB storage while Medium gear has 1GB RAM and 1GB storage. To make the concept easy, you may think Small Gear as a PC (or server) with 512MB RAM, 1GB Disk Storage and a Single Core CPU, while Medium Gear is bit powerful, a PC with 1GB RAM, 1GB Storage and a Dual Core CPU.
Cartridges are pluggable software components that can be added to an application to extend its functionality. OpenShift comes with several built-in cartridges based on the popular languages, servers, frameworks and databases. Our WordPress App uses two cartridges - PHP 5.3 and MySQL 5.1 and these two cartridges run on a small gear. In a later chapter, we add one more cartridge Cron 1.4 to add additional functionality of auto backup to the app.
Last thing to explain here is Instant App. As you would have noticed there is no WordPress cartridge and this is because, WordPress is not a programming environment but a PHP application. OpenShift WordPress comes as Instant App that bundles WordPress software and cartridges PHP 5.3 and MySQL 5.1 into an easily installable unit. Installing WordPress directly into cartridges requires some effort and keeping this in mind and to help beginners, OpenShift has bundled WordPress as an Instant App. In a later chapter, we also show how to install WordPress directly from the source code without depending on the OpenShift bundled Instant App.
Important
OpenShift documents also call Instant Apps as quickstarts. Do not confuse it with our example app - quickstart.
With that, we are ready to move onto WordPress and in the next chapter, we start with WordPress setup and basic administration.